Landscape Bracketing Script
- Tested on: S95, G5X, G7X, G1X and M3
- Should also work on other CHDK cameras
- Requires CHDK build: 1.6 or higher, ie with the fmath library. Note G5X, G7X and M3 should use the XIMR builds from @philmoz
The non M3 version of this script may be downloaded from: https://gist.github.com/pigeonhill/3fe9e52621db7149eb3505bd60b395cb
The M3 version uses a split/thick lens model (which is different to the non-M3 versions). For example read from here https://photography.grayheron.net/2021/04/m3-brackets-pupil-magnification-update.html
The M3 version has a slightly different menu arrangement and options, and a better UI than the non-M3 version, and may be downloaded from here: https://gist.github.com/pigeonhill/cdf25239bae6a4343e6431fb4c10c849
Notes & Usage Unlike macro focus bracketing, where the focus step is the same each time and very small; in landscape focus bracketing we need to calculate the focus for each step. To get the full benefits from this script, it is useful to remember that, ignoring diffraction, at the near and far depth of fields the defocus blur is, by definition, the so-called Circle of Confusion. This blur is usually accepted as being 30 microns for a 35mm full frame camera, and scaled by the crop factor for other formats, eg 11 microns on the G7X.
Having said this, 30 microns, is not the 'best focus' quality but you will not see the differences on your Facebook images, only when you create high (focus) quality prints that will be scrutinised close up, eg in a competition. As you need a line pair (black and white pixels, to see a line, it is not sensible to consider CoCs less than, say, 2-3 sensor pixels.
Defocus blur is, of course, zero at the point of focus. Also, at the Hyperfocal distance (H), the blur at infinity will be the CoC. It is useful to note that any blur at infinity can be 'dialed in', by simply focusing at a distance either side of H. Thus, on my G7X, with a CoC of 11 microns, if I focus at twice H, then the infinity blur will be CoC/2. Likewise, at H/4, the infinity blur will be some 4*CoC.
Remember that to resolve a 'feature' we need to 'see' a line pair, ie a black and a white pixel. For this reasons, when infinity blur focusing, going smaller than 2 sensor pixels is a bit of an over kill. Thus, say, on the G5X, with a 2.4 micron pixel pitch, infinity blurs less than, say, 4-5 micons will likely not give you more infinity 'sharpness', only less near depth of field.
The script scales everything relative to H and the following chart illustrates how infinity defocus blur (B) varies with respect to H. Note the chart shows an estimate of the near and far DoFs that can be used in your head: the script uses the full (‘accurate’) form of the DoF equations.
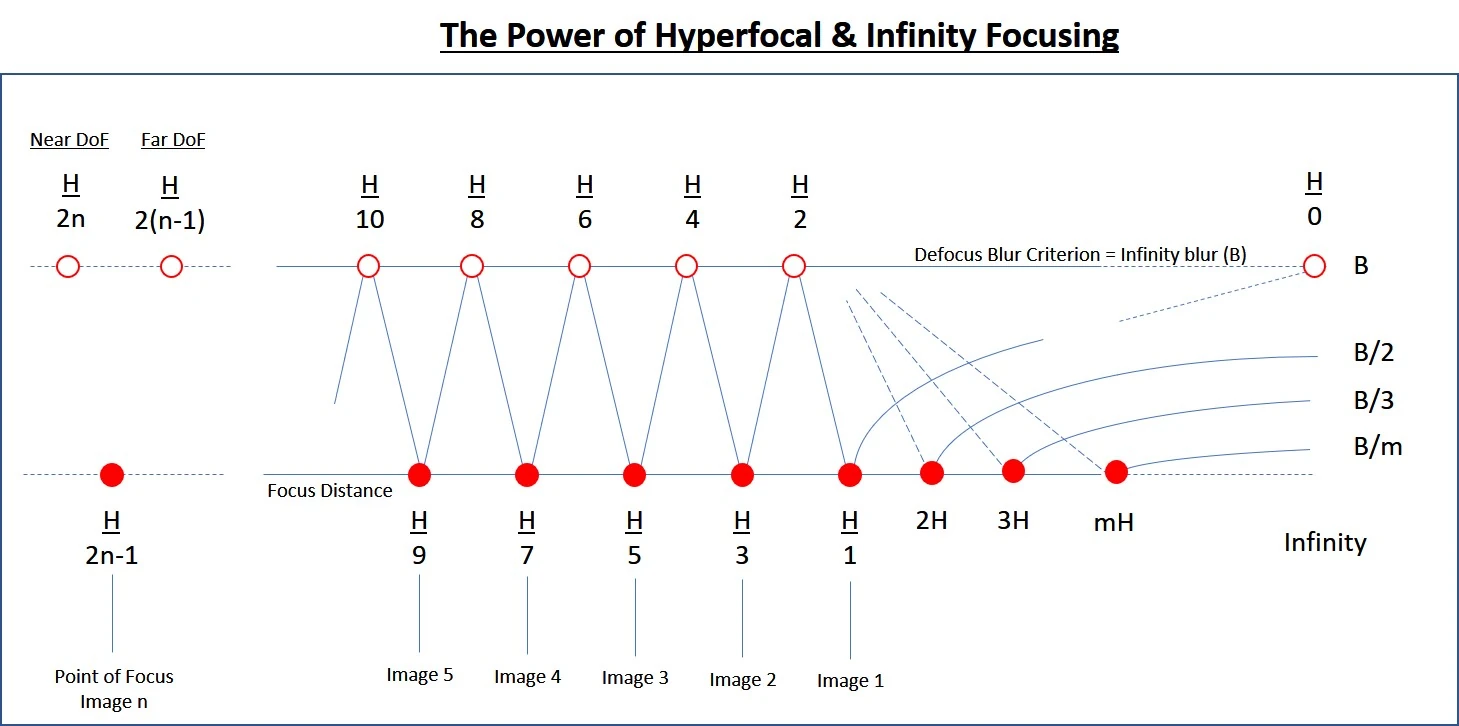
When focus bracketing we must at least ensure the previous image's far DoF is the same as the next image's near DoF: assuming we are focusing near to far as we are in this script. However, many wish to introduce some 'insurance' and have an overlap between the focus brackets. The script provides three options for this overlap: none (ie at the CoC), 2*CoC/3, CoC/2. On the M3 version you can dial in the overlap blur in microns.
The following illustrates the overlap between image n and n+1. Note that using the overlap feature comes at the cost of needing to take more brackets
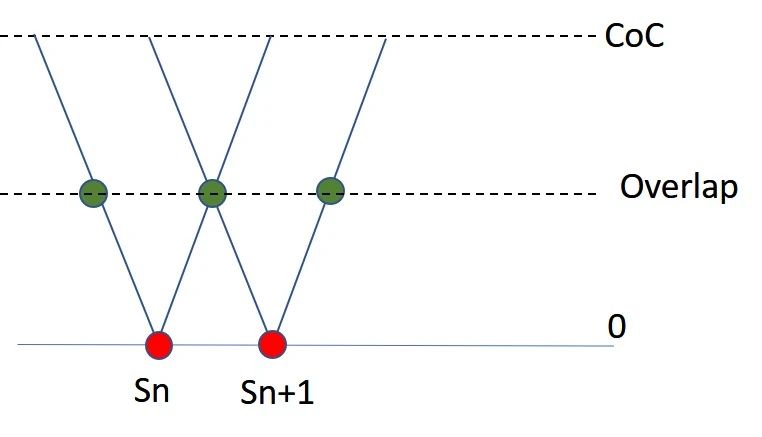
Having achieved the perfect focus brackets up to H, the script will then create an additional bracket beyond H, ie to cover the infinity focus quality. The options being 2H, 3H or 4H, giving infinity blurs of CoC/2, CoC/3 or CoC/4.
The script provides an estimate of the number of focus steps. You can elect to terminate the script if this is too large by simply doing a full shutter press.
The script can be requested to create a dark image at the beginning and end of the focus bracket set, to help differentiate the sequence in post. You can turn this off via the menu.
There are various focus bracketing strategies: current position to infinity (X2INF), min camera focus to current position (Min2X), min camera focus to infinity (Min2INF) and a fraction of H to infinity (H/x2INF).
Focus bracketing can be switched off, so that only exposure bracketing takes place
At each focus position you can also ask the script to create additional exposure brackets at either -xEv & +xEv, -xEv & --xEv or at +xEv and ++xEv. X can be 1 or 2Ev or 3Ev from the base exposure. These options cover all the usual exposure bracketing options, eg if following an ETTR approach, then a +/++ logic would be the best choice.
In addition to the 'normal' exposure bracketing options, the script offers two additional schemes. First, an ISO-less bracketing option (at ISO 800 or ISO 1600) that assumes (sic) the camera is ISO-less above ISO 800 or 1600 (check your camera to ensure you select the right ISO so the sensor read noise swamps the banding). Thus there is no point in taking brackets in the camera above this, ie just push in post. The ISO option is good for hand-holding situations and the script assumes your base image is set to the base ISO.
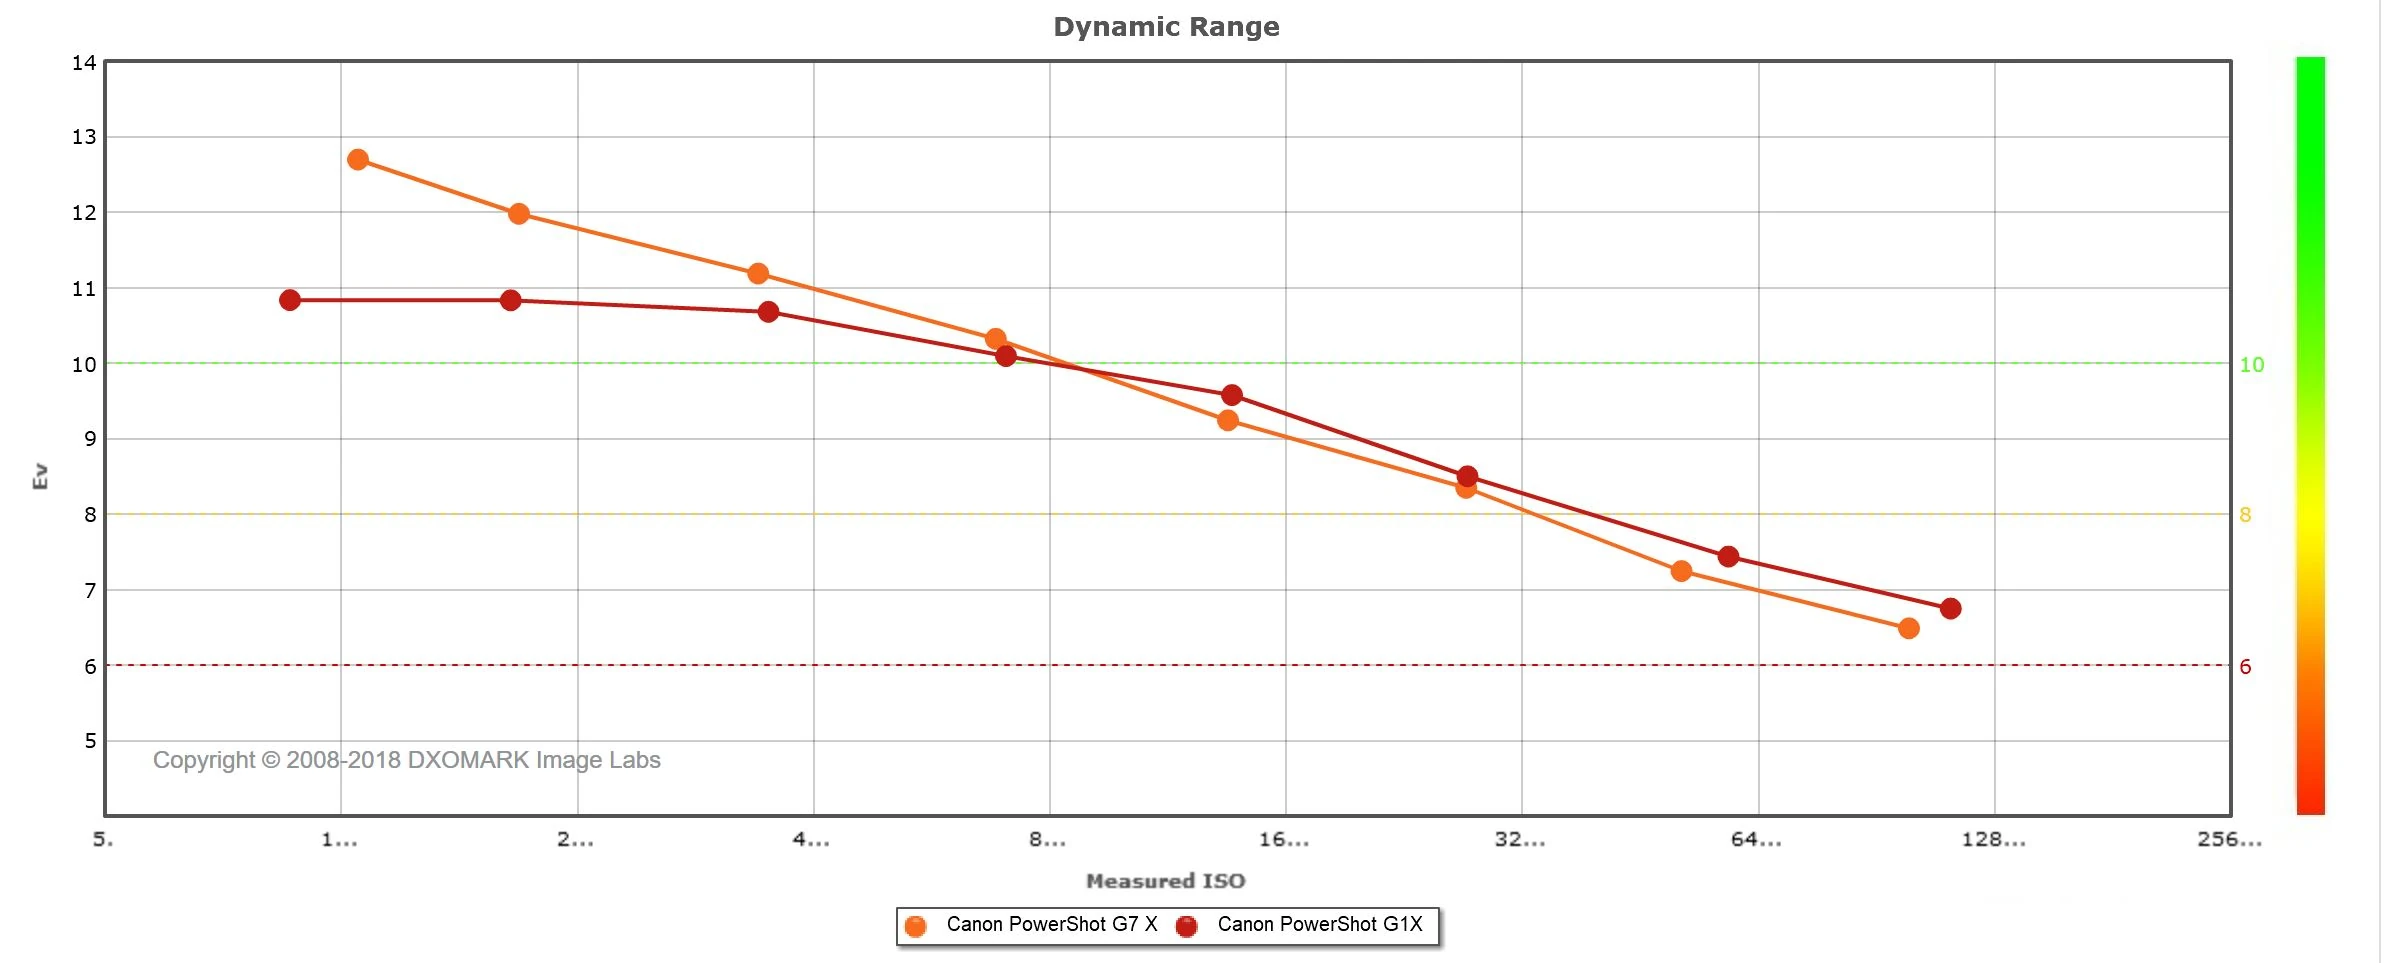
As an illustration, the chart on the right, from the DXOMark site, shows the G1X vs G7X. As can be seen the G7X can be assumed to be fully ISO invariant, which means doing ISO bracketing is pointless, ie simply push a single base exposure in post (as long as you are not too underexposed ;-))
On the other hand the G1X is only ISO-less above about 1600. Hence take a single additional bracket at, say, ISO1600.
The second additional scheme makes use of the 'Zero-Noise' approach, as suggested by Guillermo Lujik: http://www.guillermoluijk.com/article/nonoise/index_en.htm In this mode a second time bracket is taken at +4Ev or +3Ev or +2EV from the first one. To use the ZN option, simply ETTR to capture the highlights and the script will create an additional image for the shadow areas. But beware potential flares from bright highlights if you use the +4Ev option.
The script provides an automatic exposure bracketing option, that assumes your base exposure is set for the shadows; and a wind bracketing option that takes an image at a faster shutter speed, but at the same exposure.
Finally, there is an option to switch on sky bracketing that adjusts the exposure when at infinity, using an ETTR approach. This allows you to focus bracket for the land at one exposure and capture the sky at another.
The script will pause to alert you to the number of focus steps that will be taken (exposure brackets are on top of this). The script will also provide feedback on infinity blur.
To capture the brackets you have requested, simply do a half shutter press or, to terminate the script, ie too many brackets, press the selected exit key (which you can set up as a camera specific option in the script).
The script is started in the normal way, eg by doing a full shutter press. The script requires the camera to be in M and MF modes. The script is not designed to respond to focal length or aperture changes, once started.

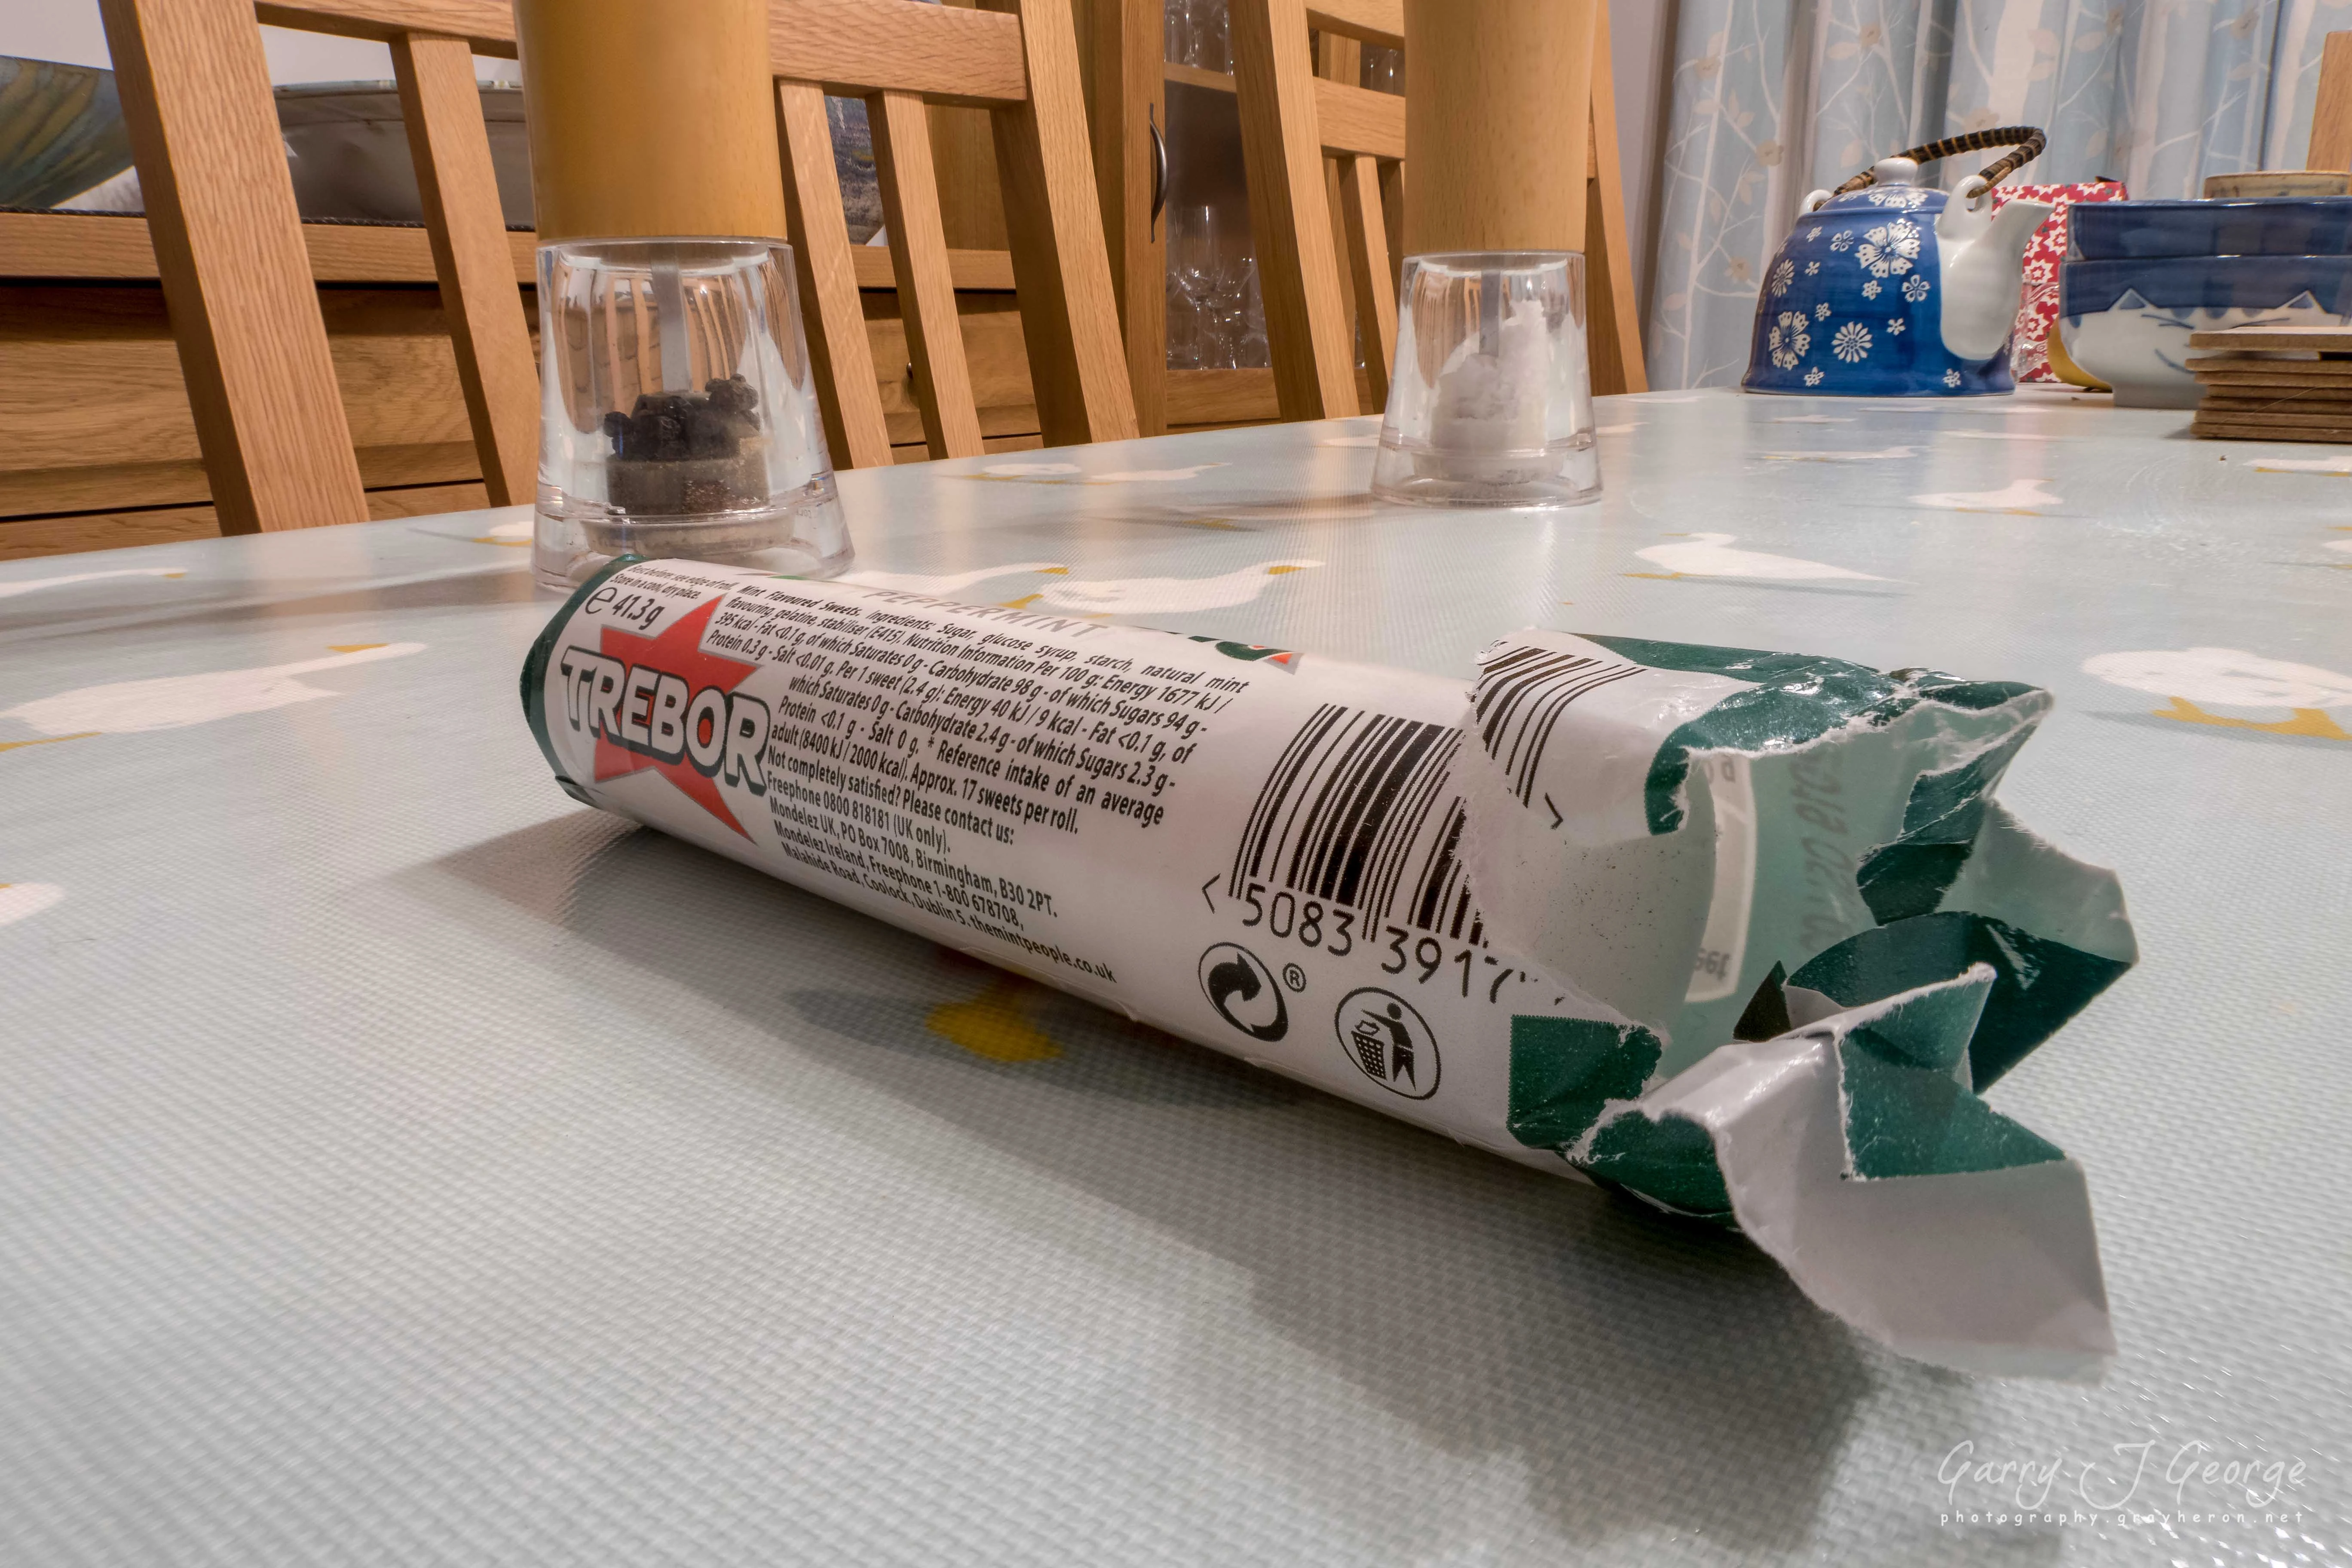
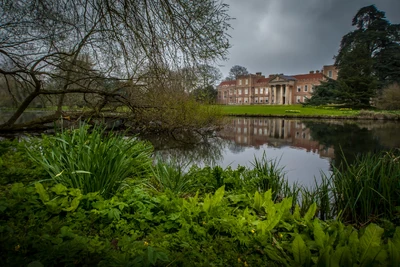
Here are a few test images I took with the script. The post processing was carried out in Lightroom, with a round trip to Helicon Focus.
Finally, you will find information about this script and other photography matters on my blog at photography.grayheron.net
Compatibility Note: as hinted above, there are two versions of the script: one for the M3 and one for all other CHDK cameras that can meet the script's running requirements. The M3 version uses a thick lens model, which attempts to address the lens hiatus and pupil mag. The non-M3 version does not model the lens hiatus and pupil magnification, as the lens design details are 'hidden'. The M3 version UI is provided by an info bar and this script handles the Canon/CHDK interface/interactions well. The non-M3 version provides feedback through the CHDK console and this relies on the CHDK and Canon GUIs behaving themselves. If the console disappears on the non-M3 version, pressing SET should recover it. Finally, the non-M3 version's feedback is via the CHDK console, and rather simplistic relative to the M3 version, to ensure maximum camera compatibility.
Save to your /SCRIPTS/ folder as usual.

.jpg)